


Imagine how wonderful it would be, if you could reach out to each of your potential customers, and travel to places where they are located. But, it isn’t a perfect world!
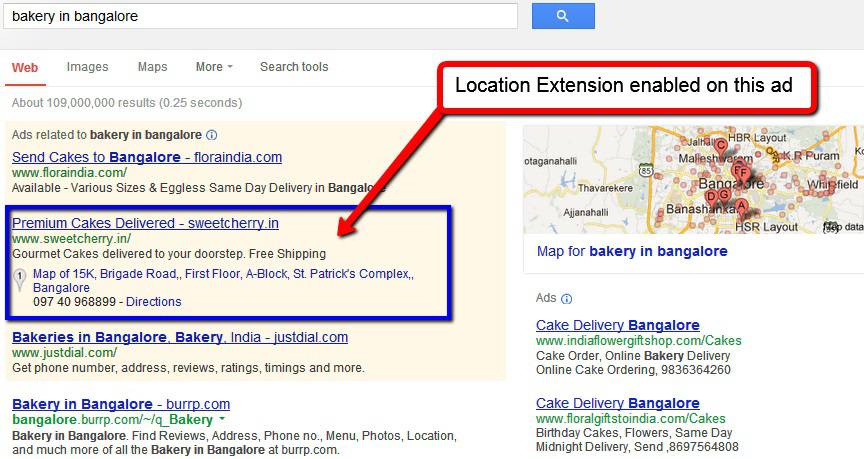
However, thanks to Google location extensions, you can now help your customers search and locate your business easily. They can find directions on the map to reach you, or even better, they can call you directly to feed their queries or place orders. Wow! So much with only one simple step; add Location Extensions to your Google Adwords Campaign.
I have already discussed the benefits of using Location Extensions in my previous blog post. So, I am going to keep this post focused on Google Adwords Location Extensions Setup. But before I begin, I should inform you that location extensions work only on the following types of campaigns:
- Search & Display Networks – Standard & All Features
- Search Network only – Standard & All Features
- Display Network only – Mobile Apps & All Features
You can Learn more about different campaign types from Google’s Support Documents.
Now let’s discuss the steps to add Google Adwords Location Extensions in your Adwords campaigns
To add location extensions to new ad campaigns, follow these steps:
(Click on the images in step 3 & 4 to enlarge them)
Step 1 | Sign in to your Adwords account. |
Step 2 | Click on the Campaigns tab |
Step 3 | Click New Campaign  |
Step 4 | Under Ad extensions > Locations, Check the box next to”Extend my ads with location information” |
Step 5 | Select one or both of the sub-options:
|
Step 6 | Click Save and continue. |
Steps for adding location extensions to existing campaigns do not differ much. Check it out below:
(Click on the images in step 4 & 6 to enlarge them)
Step 1 | Login in to your Adwords account |
Step 2 | Click on the Campaign tab |
Step 3 | Click on the name of the Campaign you would like to edit |
Step 4 | Click the Ad extensions tab (shows the current extension status) |
Step 5 | Click View and select the Location Extensions from the drop down menu bar |
Step 6 | Click New Extension under either of the following sub-options:
|
Step 7 | Click Save |
Click on the link to know more about Google Adwords Location Extensions Settings.
Great job guys! Now that you are done setting up Location Extensions in your ad campaigns, enjoy the increased CTR and Conversion rates on your website. Stay tuned to get more information on other Ad Extensions setups and keep reading.


