


SALES
Reach Out to your Leads and Contacts with Custom Audience on Facebook
Contents

Advertising on social networking sites is taking giant strides. Despite this impressive advancement, several brands and marketers are still facing difficulties to find the right audiences, particularly on Facebook, the web’s most effective advertising platform currently. But, with the introduction of Custom Audiences, Facebook has offered advertisers a very powerful marketing tool. Custom Audience on Facebook allows advertisers to target their ads to users through email IDs, phone numbers or Facebook user ID. Isn’t that something?

And, just in case you have missed this, here’s a complete guide to custom audience on Facebook, steps to help you create custom audience and its benefits to marketers.
Like the term suggests, custom audience is a set of people who are ‘customized’ to view your ads. On Facebook, being able to ‘customize’ your audience means that Marketers can target their ads to a specific set of Facebook users using their Email IDs, Facebook IDs, phone numbers or application IDs.
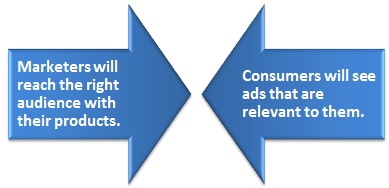
Let me explain this to you, you will find that: –
(I know, some of the above mentioned terms may sound high tech, fret not! I have explained the entire process in detail below).
Very briefly, what is hashing?Hashing is a way to secure information and compress it. Like Wikipedia puts it, hashing maps data of variable length to data of a fixed length. In short, hashing is used to get short output data that acts as a shortened reference to the original data. It also secures the data and makes it ‘private’. You need not worry about privacy, the email addresses/phone numbers are hashed or encrypted before being sent to Facebook. |
However, here are the rules that you need to follow before setting your custom audience on Facebook.
Step 1: When you go to your Facebook’s Ad Manager, on the left hand side you will find the ‘Power Editor’ tab. If Power Editor has not been installed on your computer, you will see this window wherein you will be asked to Download it.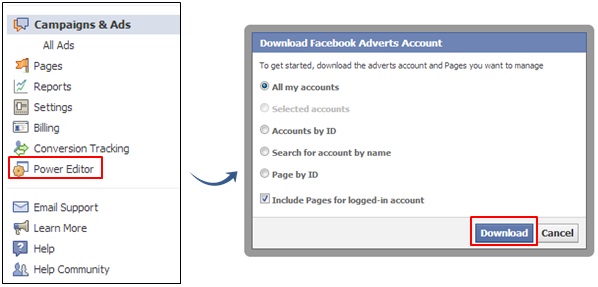
Step 2: In order to set your custom audience, you have to have knowledge of Power Editor, Facebook’s bulk ad editing too. 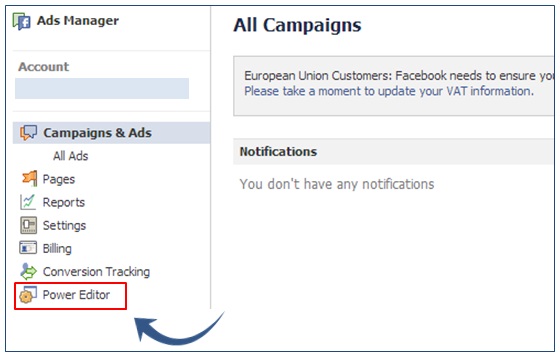
Step 3: Within Power Editor, you will find a Create Audience tab. Click on that to begin the process of creating your Custom Audience. When you click on the Custom Audience tab, you will be asked to accept the terms and conditions. Click on ‘Accept’ to take the next step.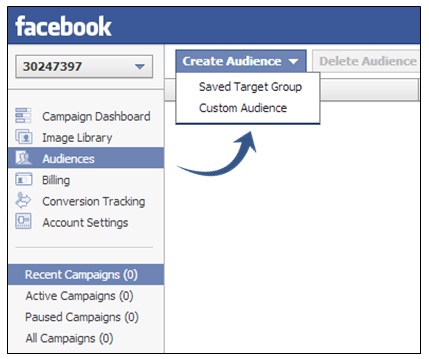
Step 4: Next, name your audience and add a description (keep the name and description as close as possible to your campaign to prevent confusion later). Select a file from your computer – email addresses, phone numbers or Facebook ID’s and upload it. (Make sure that it is a CSV or TXT file with only one column). 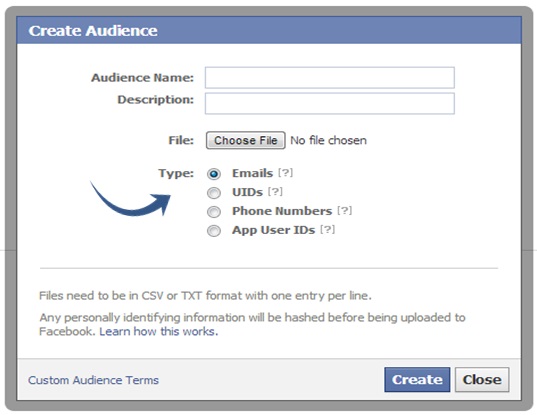
Step 5: Facebook will hash the audience list which you have provided to the existing profiles. (this number can be lower than your original list because some people may not be highly active users or some may not be using the same email id/phone number that you have provided).
Step 6: Once the file has been uploaded successfully, click on ‘Create’ button to create your custom audience. This can take a really long time, so be patient. You will see the following message.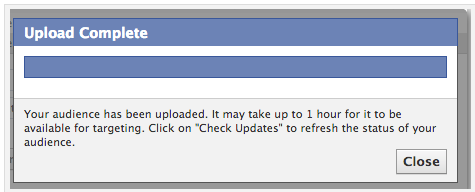 Step 7: Once your file has been uploaded, your campaign status will show ‘Ready’.
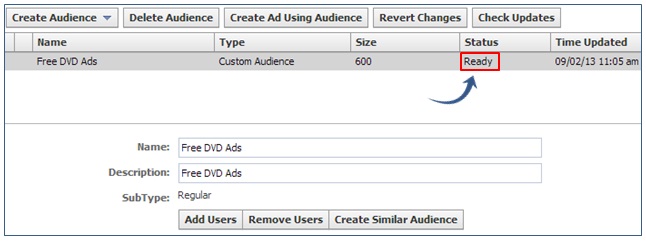
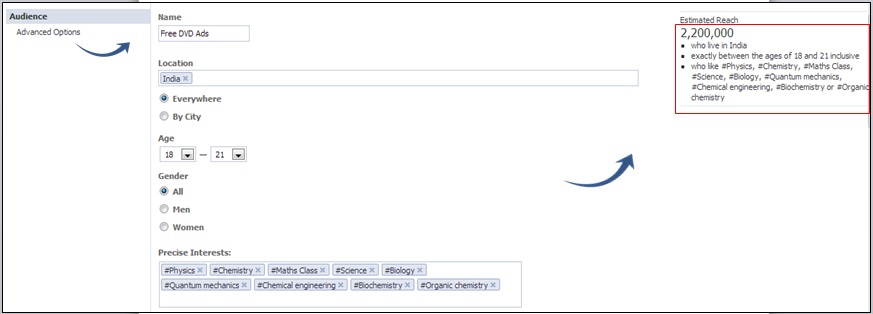
Step 8: Okay, now that your Custom Audience is ready, lets put it to use in an ad! Click on the Audience button on your left hand corner. You will see this window. Like any other Facebook ad targeting, give a name to your ad, add a specific location, age and interests of your target group. After all the filters have been set, the number you see on the right (highlighted in red) will be your target group.
Step 9: For further targeting, click on the Advanced Options tab under Audience. You will see the following screen. Choose your custom audience from the lists that you have uploaded. These are the people who will be able to view your ad. The next column is that of ‘Excluded audiences’.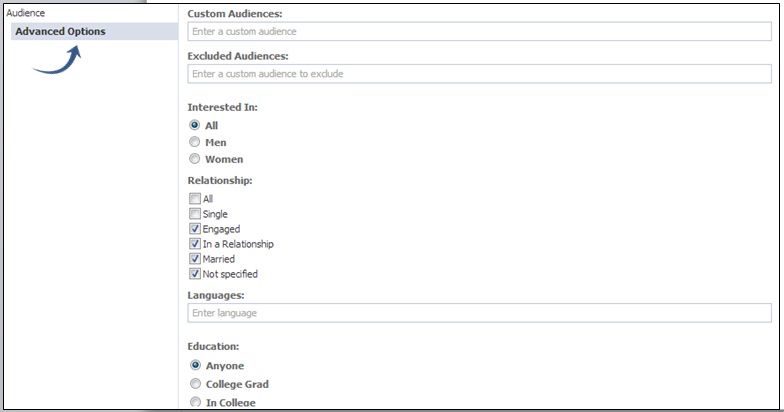
Step 10: Once you have accomplished all the steps, you are good to go!
| Save time & money with ‘Excluded’ Audience | There may be many people who are already your existing customers or may have already purchased the product that you are placing an ad for, why would you want to show them your ad? Hence, if you put them in the ‘Excluded Audiences’ category, Facebook will refrain from serving them your ad. This saves you from shelling out more money in PPC ads. |
| Get more Facebook likes | This one is pretty obvious, isn’t it? Now that you can target offline Facebook users who have not liked your page, your likes will automatically increase once they see your ads. |
| Drive more Conversions | Say you are a business which collects email addresses for lead generation. Why not upload them on Facebook as your Custom Audience? You can then serve your ads to this set of people who are more likely to convert.Here is an example: Lets say you have a list of students who have purchased Physics study modules from you. Now, you have launched a new product which is study modules on Chemistry. Create an ad on Facebook to target people who have purchased the Physics modules and alert them of the study material on Chemistry. The people who have already purchased Physics need not be your Facebook fans, they already trust your product. Hence, they are more likely to convert than any other user. |
| Get more Signups | If you send newsletters to customers on a regular basis, extract the email of list of people who haven’t signed up for the newsletter yet. Upload that group as your Custom Audience. You can then serve ads promoting your newsletter and how useful it is to those customers. |
Since this is a new addition to Facebook’s targeting options, the more number of times you upload your email list, the more people you gather in your custom audience list. So, say for example, you upload a list of 5000 email Ids. The first time you upload it onto Facebook, you see that Facebook has been able to match say 1200 email IDs. When you upload it once again, Facebook matches 2200 email IDs and this goes on and on each time you upload the file. However, we are not yet sure as to how many times you can upload the file onto Facebook.
Take the targeting process one step further by creating a ‘Lookalike Audience’ on Facebook. Stay tuned for my next post where I will give you a detailed guide on ‘Lookalike Audience’. Have you started using Custom Audience on Facebook yet? Share in what ways do you plan to use it? Do leave me a comment. Happy targeting!
Add custom tabs on your Facebook pages that link to LeadSquared’s landing pages here.
Enter your details and we'll send you a quick confirmation email to verify your address.


 Target Facebook Users Similar to your Customers using Lookalike Audience