


MARKETING
Using Powtoon Video Marketing Tool for Lead Generation
Contents
In an earlier blog post we had discussed how marketers/business owners can use video marketing tools to generate leads. The best part about using these tools is that you don’t have to be a rocket scientist to be able to create amazing professional looking videos to attract viewers.
Here we will discuss how you can use Powtoon video marketing tool to create videos which will help you generate leads.
Simply put, Powtoon video marketing tool ups the ante of your power point presentations using animated characters and music. If you are an amateur and worried about using this tool, fret not! As a marketer, you will need minimalist technical skills to design professional looking animated explainer videos using Powtoon.
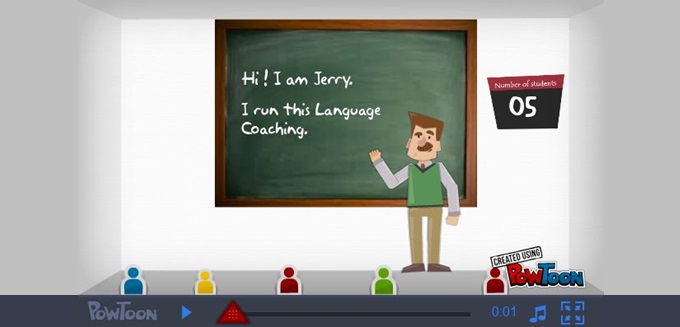
Before we begin explaining the step-by-step procedure, take a look at a video that we took a shot at using Powtoon.
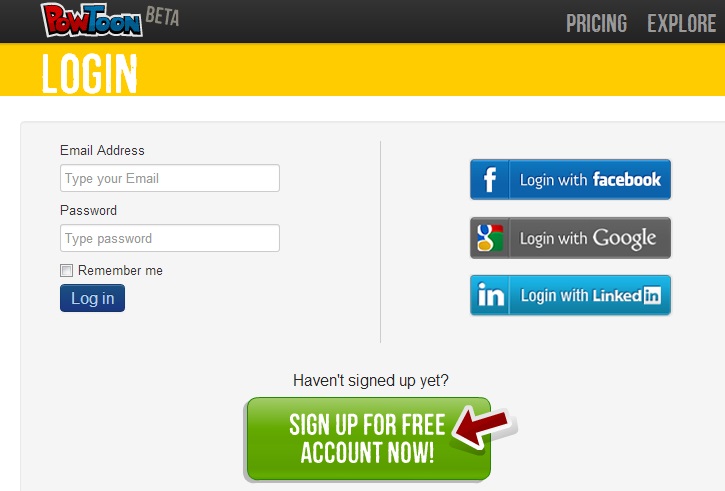
Step 1: Once you get to the Powtoon home page, you will need to create a login id. You can also log in using your Facebook, Google or Linkedin id.
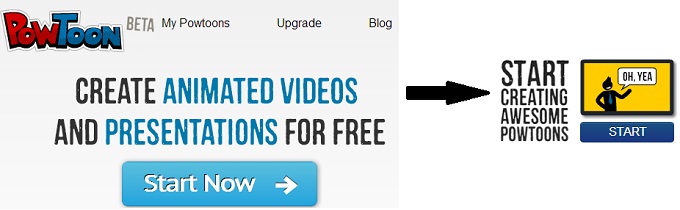
Step 2: After logging in, click on the ‘Start Now’ button. This will take you to this page shown on your right. Click on the ‘Start Creating Awesome Powtoons’ button to begin the fun!
Step 3: Next, you will be taken through a pop-up window wherein you will have to choose a category, template and name of your video.
Step 4: Once you have saved your choice, you will be directed to a new window to begin your work. This is how your ‘stage’ will look. The ‘stage’ is the window where your presentation will take shape.
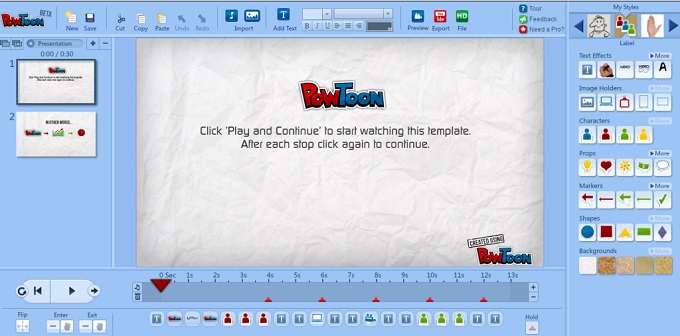
Step 5: Before we begin, let us quickly run you through the various features of the ‘stage’.
1. At the bottom of the page you have the ‘Duration Bar’ and on its left, there is the play and replay buttons.

2. On the right hand side of your screen, you have the various tools which will help you create your videos.
3. At the top of your page you have the menu panel very similar to one on your Microsoft PPT.

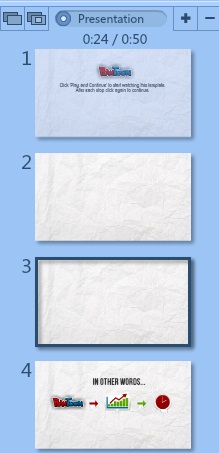
4. On the left side you can preview, edit and delete your slides.
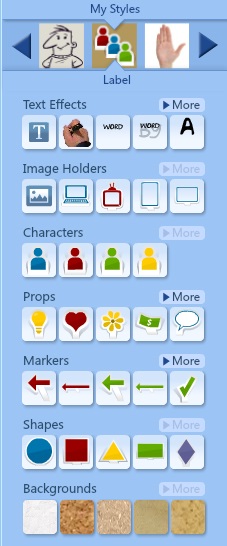
Step 6: First and foremost, choose a particular style for your video from the ‘My Styles’ tab on your tool bar. (Remember, each style has a different set of characters and features that you can use in your video).
Step 7: Then choose a background for your video using the ‘Backgrounds’ tab from the tool bar.
Step 8: Once the background has been set, click on the ‘Add Text (T)’ functionality on the top of your page if you want to write something. You can also select one of the many ‘Text Effects’ from the tool bar to add text.
Step 9: You can then add props, characters, markers and several other elements and animate them as you like from the tool bar on the right.
Step 10: Click on the ‘More’ button beside every option on your tool bar to reveal available characters and items under each category.
Step 11: You need to control your characters using the red ‘playhead’ on the timeline bar. Now, this can be a little tricky, but with practice and patience, you will be able to master the art in no time. By moving the red play head left and right, you can decide when your character/object comes on ‘stage’ and for how long it stays. (The length of each slide is 10 seconds by default. You can increase/decrease them by clicking on the plus and minus buttons on your timeline’s right. However, you cannot go beyond 20 seconds per slide.)
Step 12: Add music to your video by exporting a music file saved on your computer by clicking on the ‘Import’ button on the top of your page.
Finally, explore, explore & explore, you will get better with each try.
** The video shown in this article has been created using the basic free plan of Powtoon. You can upgrade to a paid package for better features. **
Enter your details and we'll send you a quick confirmation email to verify your address.


 Google Adwords Location Extensions Setup Guide