


MARKETING
How to Create a Google Plus Local Page for your Business?
Contents

Like Facebook, Twitter, LinkedIn and all the other major sites, it is imperative and highly beneficial that you create a Google plus page for your business. More specifically, if your business caters to a local audience, then it’s probably a good idea to create a Google plus local page for your local business. In this post, I will take you through the steps involved, so you can create a page of your own.
A local Google plus business page will benefit your business in many ways. Apart from popping up in search results, it will give your business authenticity and more exposure. The image below shows you the outcome of having a Google plus local page for your business.

Given below are the steps involved in creating a Google plus page for your local business.
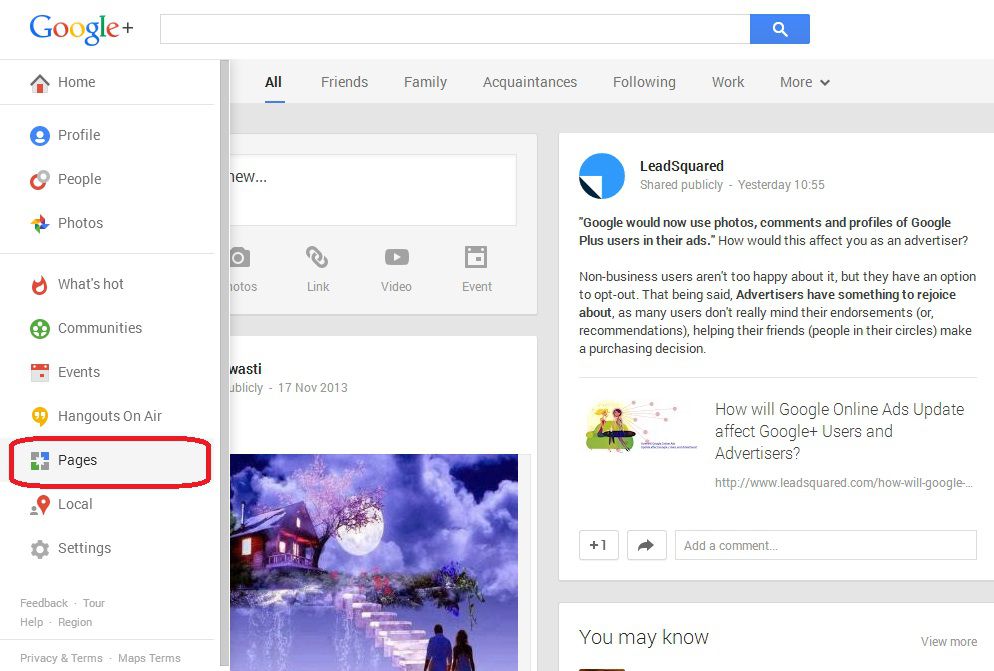
Log in to your Google+ account and go to ‘Home‘. A drop-down box will appear in which you have to select ‘Pages‘.
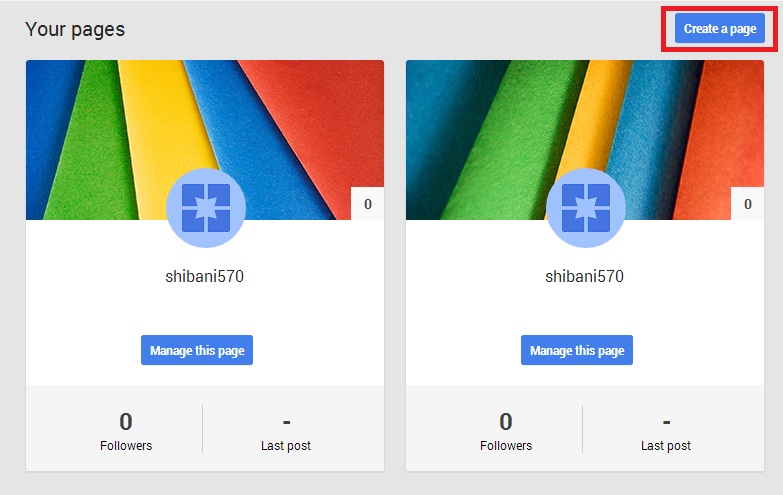
Click on ‘Create a page‘ (encircled in red) to get started with your Google plus page for your local business.
Pick a category from the options provided. They include:

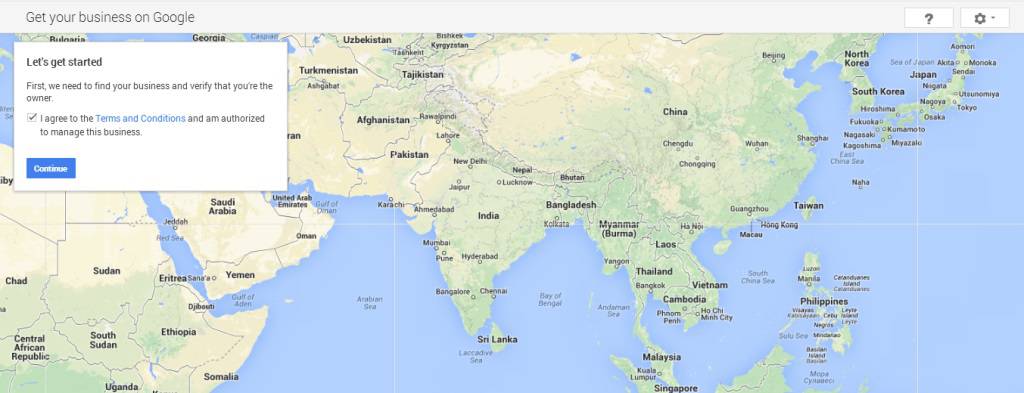
Since this post is about creating a Google plus page for your local business, we will move ahead with the ‘Local Business or Place‘ option. In this step, you will need to verify the location of your business and agree to the terms and conditions.
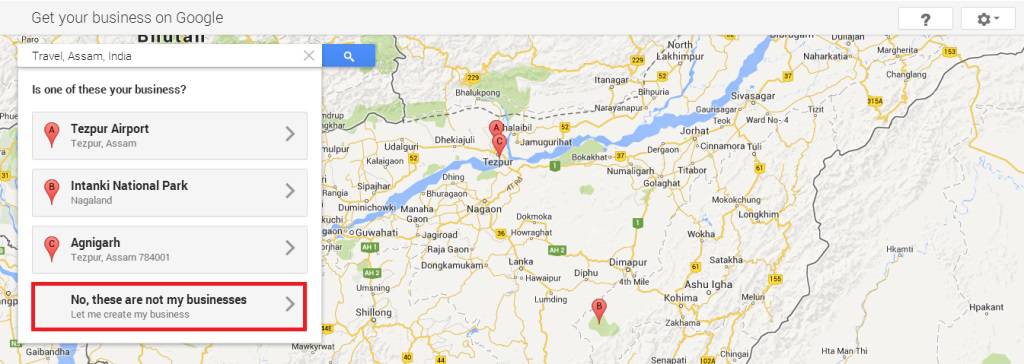
As this is only a test page, we have searched for ‘Travel, Assam, India’ in the search box. This will lead you to a couple of search results. If you are creating a Google plus page for your business, for the first time, then your business will surely not show up in the search results. In that case, click on the last option – ‘No, these are not my businesses‘.
Since it’s a new page, you will have to provide details of your business. Information related to the address, type of business, and other verification details are required. Once you have filled in the details, click on ‘Submit‘.

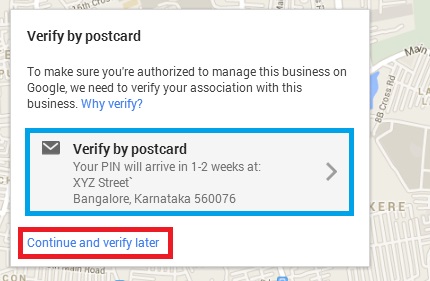
Verify your local business by clicking on the ‘Verify by postcard‘ box encircled in blue. Alternatively, you can also choose to verify later by clicking on ‘Continue and verify later‘ option at the bottom (encircled in red).
(Please note that if you choose to verify later, then remember to do so, in order to avail full functionality of your local business page. Until you do so, features like reviews and other benefits will be restricted to your page).
Tadaa – your Google plus local page for your business is ready! (Those of you who clicked on ‘Verify by postcard‘ would have another step before this – just to verify your address for the final time. Nonetheless, you will eventually come to this page after you have verified your address.)

Now that you have created your Google+ page for your business, get started!
Before I get into the benefits, take a look at this verified local business page (notice the ‘Verified local business‘ tag next to the logo) –

A verified local business page
A local business page that has not been verified will be incomplete (no information about location, phone number, etc) and users will not be able to post reviews. In other words, it will lack authenticity. So get your Google plus local page verified today!
Enter your details and we'll send you a quick confirmation email to verify your address.


